By using this website, you are consenting to its data collection for analytics, advertising & user experience enhancement. Enjoy!
# Cooking
with mum and dad #
Sweet
Savoury
Listen to Music @ bottom of page
This Website brought to you by:

3 Sister Recipe inc'
& Voiconomy
Lemon and Herb Crusted Rack
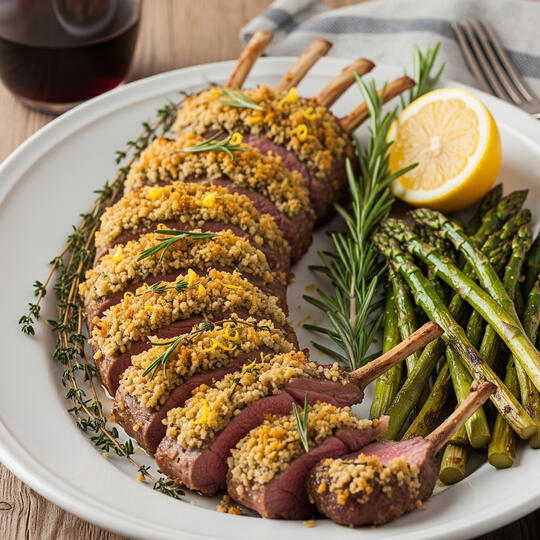
This recipe for Lemon and Herb Crusted Rack of Lamb with Roasted Asparagus is a classic that's been gaining popularity for its elegant presentation and incredible flavor. It's perfect for a special occasion or a weekend dinner.
Lemon and Herb Crusted Rack of Lamb with Roasted Asparagus
This recipe combines the rich, tender flavor of a rack of lamb with a bright, aromatic crust. The roasted asparagus on the side makes it a complete and beautiful meal.
Yields: 2-3 servings
Prep time: 15 minutes
Cook time: 20-30 minutes
Ingredients:
For the Lamb:1 rack of lamb, about 1.5 - 2 pounds (700-900g), frenched (ask your butcher to do this)2 tablespoons olive oilSalt and freshly ground black pepper to tasteFor the Herb Crust:1/2 cup panko breadcrumbs1/4 cup finely chopped fresh parsley2 tablespoons finely chopped fresh rosemary1 tablespoon finely chopped fresh thymeZest of 1 large lemon2 cloves garlic, minced2 tablespoons olive oil1 tablespoon Dijon mustardFor the Asparagus:1 bunch of asparagus, about 1 pound (450g), trimmed1 tablespoon olive oilSalt and pepper to tasteOptional: a squeeze of lemon juice and a sprinkle of Parmesan cheese
Instructions:
Prep the oven and lamb:Preheat your oven to 400°F (200°C).Pat the rack of lamb dry with paper towels. Rub it all over with 2 tablespoons of olive oil and season generously with salt and pepper.Sear the lamb:Heat a large, oven-safe skillet (cast iron works great) over medium-high heat.Place the rack of lamb, fat-side down, in the hot skillet. Sear for 3-4 minutes until the fat is golden brown and crispy.Flip the lamb and sear on the other side for another 2-3 minutes. Remove the skillet from the heat.Make the herb crust:In a small bowl, combine the panko breadcrumbs, chopped parsley, rosemary, thyme, lemon zest, and minced garlic. Stir to combine.In a separate small bowl, mix the Dijon mustard and 2 tablespoons of olive oil.Using a pastry brush or spoon, spread the mustard-oil mixture evenly over the top (fat side) of the seared lamb.Press the herb and breadcrumb mixture firmly onto the mustard-coated side of the lamb, creating a thick crust.Roast the lamb and asparagus:Arrange the trimmed asparagus spears on a baking sheet. Drizzle with 1 tablespoon of olive oil and season with salt and pepper.Place the skillet with the lamb into the preheated oven.Place the baking sheet with the asparagus on the rack below or next to the lamb.Roast for 15-25 minutes. The cooking time will depend on how you like your lamb. Use a meat thermometer for accuracy:Rare: 125°F (52°C)Medium-Rare: 130-135°F (54-57°C) - This is the recommended doneness for rack of lamb.Medium: 140-145°F (60-63°C)The asparagus should be tender-crisp in about 15-20 minutes.Rest and serve:Once the lamb reaches your desired temperature, remove it from the oven and transfer it to a cutting board.Crucially, let the lamb rest for at least 5-10 minutes before slicing. This allows the juices to redistribute, ensuring a tender and juicy result.While the lamb is resting, you can sprinkle the roasted asparagus with a little fresh lemon juice or grated Parmesan if desired.To serve, slice the rack of lamb into individual or double chops by cutting between the bones. Serve with the roasted asparagus on the side.

Raspberry & Coconut Delight Slice
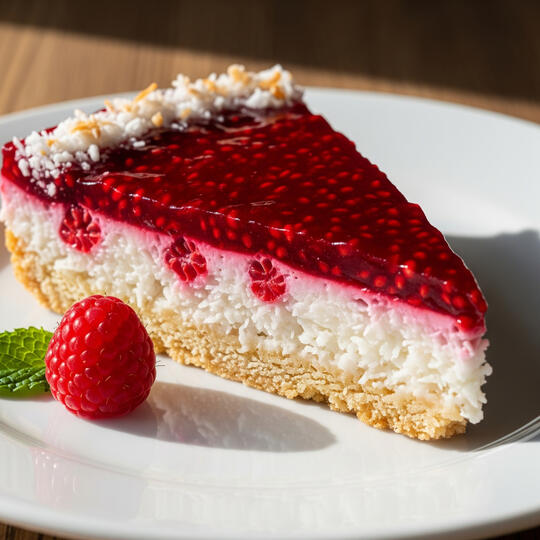
A truly delicious Raspberry Delight Slice is a classic Australian bakery treat, often featuring a buttery shortbread base, a vibrant layer of raspberry jam, and a sweet, golden coconut topping. This recipe combines the best elements for a simple and "yummiest" version.
Yummiest Raspberry & Coconut Delight Slice
Ingredients:
For the Base:
* 160g unsalted butter, softened
* 150g (3/4 cup) caster sugar
* 1 large egg, room temperature
* 2 tsp vanilla extract or paste
* 300g (2 cups) plain all-purpose flour
* 3 tsp baking powder
* A pinch of saltFor the Filling:
* 400g (14 oz) good quality raspberry jamFor the Topping:
* 140g (1 1/2 cups) desiccated coconut
* 140g (1 1/2 cups) shredded coconut (or use all desiccated)
* 110g (1/2 cup) caster sugar
* 3 large eggs, lightly beaten
Instructions:
1. Prepare the Base
* Preheat your oven to 160°C (320°F) fan-forced.
* Grease and line a 20cm x 30cm (8x12 inch) slice tin with baking paper, leaving an overhang on the sides.
* In a stand mixer or a large bowl with a hand mixer, beat the softened butter and sugar on high speed for about 3 minutes until the mixture is pale and fluffy.
* Add the egg and vanilla and beat until just combined.
* In a separate bowl, whisk together the flour, baking powder, and salt. Add this to the butter mixture and beat on low speed until it just comes together into a soft dough.
* Press the dough evenly into the base of the prepared tin. A small rolling pin or the back of a metal spoon can help to get a smooth, even surface.
* Bake the base for 20 minutes, or until it is starting to turn a light golden color at the edges.2. Add the Jam and Topping
* Remove the base from the oven and set it on a wire rack. Leave the oven on.
* While the base is still hot, carefully spread the raspberry jam evenly over the surface.
* In a bowl, mix together the desiccated coconut, shredded coconut, caster sugar, and the lightly beaten eggs. Use your hands to mix this thoroughly, ensuring all the coconut is coated with the egg mixture.
* Dollop spoonfuls of the coconut mixture over the jam and gently pat it down with your hands to create a smooth, even layer.3. Bake and Cool
* Place the tin back in the oven and bake for another 25 minutes, or until the coconut topping is a beautiful golden brown.
* Remove the slice from the oven and place it on a wire rack to cool completely. For the cleanest slices, it's best to chill it in the fridge for a few hours before cutting.4. Slice and Serve
* Use the baking paper overhang to lift the entire slice out of the tin.
* Using a sharp, serrated knife, cut the slice into squares or rectangles.
* Store in an airtight container at room temperature for up to a week.

Glorious Vanilla Slice

A truly glorious vanilla slice is all about a few key things: flaky, crispy pastry, a thick and creamy custard that holds its shape, and a sweet, smooth icing. This recipe combines the best of traditional methods to help you achieve that perfect bakery-style slice.
Glorious Vanilla Slice
This recipe uses a rich, egg-based custard and a simple icing. The key is taking your time, especially with the custard and the chilling process.
Ingredients:
For the Pastry:
* 2 sheets frozen butter puff pastry (thawed)For the Custard:
* 500g (2 cups) whole milk
* 250g (1 cup + 2 tbsp) caster sugar, divided
* 80g (2/3 cup) cornflour
* 2 large eggs
* 4 egg yolks
* 1 vanilla bean, split, or 2 tbsp vanilla bean paste
* 60g (1/4 cup) unsalted butter, cold and cubedFor the Icing:
* 175g (1 1/2 cups) icing sugar, sifted
* 2 tbsp hot water (or milk)
* 1 tsp vanilla extract (optional)
* A drop of pink food colouring (optional)
Instructions:
1. Prepare the Pastry
* Preheat your oven to 180°C (350°F) fan-forced.
* Line two baking trays with baking paper.
* Lay one sheet of puff pastry on each tray. Prick the pastry all over with a fork to prevent it from rising too much.
* For a perfectly flat pastry, place another sheet of baking paper on top of each pastry sheet, and then place another baking tray on top to weigh it down.
* Bake for 20-30 minutes, or until the pastry is a deep golden brown and completely crisp.
* Once baked, remove from the oven and let cool completely on a wire rack. Using a sharp serrated knife, trim the pastry to fit your baking tin (a 20cm x 20cm square tin is ideal). Set aside.2. Make the Custard
* In a large saucepan, gently heat the milk and the vanilla bean (or paste) over medium heat until it is steaming but not boiling. If using a vanilla bean, scrape the seeds into the milk and add the pod as well.
* In a separate bowl, whisk together the cornflour, 150g of the caster sugar, the whole eggs, and the egg yolks until smooth and pale.
* Once the milk is hot, gradually whisk about 1/2 cup of it into the egg mixture. This is called "tempering" and prevents the eggs from scrambling.
* Slowly pour the egg mixture back into the saucepan with the rest of the milk, whisking constantly.
* Continue to cook over medium heat, whisking constantly, until the mixture thickens and starts to bubble. It's crucial to let it bubble for at least 1-2 minutes to ensure the cornflour is cooked and the custard will set properly.
* Remove the pan from the heat. Whisk in the cold, cubed butter until it is completely melted and the custard is smooth and glossy.
* Remove the vanilla pod if you used one. For the smoothest custard, you can push the mixture through a sieve into a clean bowl.
* Cover the surface of the custard with plastic wrap, pressing it directly onto the custard to prevent a skin from forming. Let it cool for at least 20 minutes before assembling.3. Assemble the Vanilla Slice
* Line your baking tin with baking paper, leaving an overhang on the sides to help you lift the slice out later.
* Place one sheet of the cooled, trimmed pastry in the bottom of the tin.
* Pour the cooled custard over the pastry and use a spatula to spread it evenly.
* Gently place the second sheet of pastry on top of the custard. Press down very gently.
* Chill the slice in the fridge for at least 4 hours, but preferably overnight, to allow the custard to set firmly. This is the most important step for clean slices.4. Make the Icing
* When the slice is chilled and ready, prepare the icing.
* Sift the icing sugar into a bowl.
* Gradually add the hot water (or milk), whisking until you have a smooth, thick, and spreadable icing. Add a little at a time to ensure it doesn't become too runny. Stir in the vanilla and food colouring if using.
* Spread the icing evenly over the top pastry layer using a flat knife or spatula.
* Return the slice to the fridge for a final 15-30 minutes to allow the icing to set.5. Slice and Serve
* To cut, lift the entire slice out of the tin using the baking paper overhang.
* Using a sharp, serrated knife, gently saw back and forth through the top pastry layer to score it. Then, press down firmly and in one motion to cut through the custard. It's helpful to clean the knife between each cut for a clean finish.
* Cut into desired slices and dust with a little extra icing sugar before serving. Enjoy your glorious vanilla slice!

Viral Baked Feta Pasta
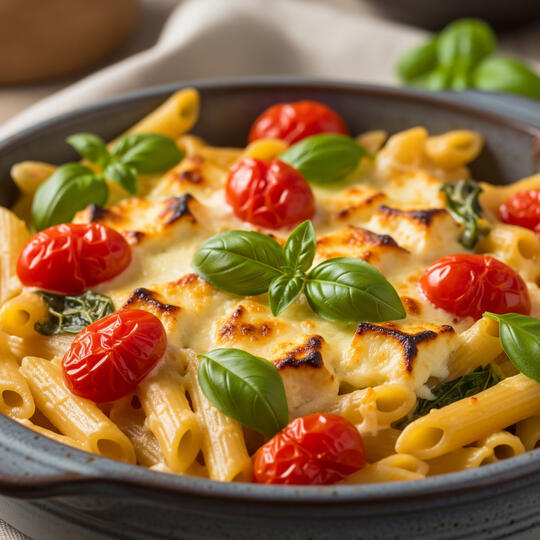
This recipe originated in Finland and went absolutely viral on TikTok and other platforms because of its simplicity, visual appeal, and delicious result. It’s the perfect one-pan meal that requires minimal effort.
Viral Baked Feta Pasta
Recipe is designed to serve 4 people.
Ingredients:
1 block (7-8 oz) of feta cheese2 lbs cherry or grape tomatoes1/2 cup extra virgin olive oil2-3 cloves garlic, minced1/2 tsp red pepper flakes (optional, for a kick)1/4 cup fresh basil leaves, torn or choppedSalt and black pepper to taste1 lb pasta of your choice (spaghetti, rigatoni, orzo, etc.)
Instructions:
Prep the Pan: Preheat your oven to 400°F (200°C). In a baking dish, add the cherry tomatoes and minced garlic. Pour the olive oil over the tomatoes, season with salt, black pepper, and red pepper flakes. Toss to combine.Add the Feta: Create a space in the center of the tomatoes and place the block of feta cheese in the middle. Drizzle a little more olive oil over the feta.Bake: Bake for 25-30 minutes, or until the tomatoes are bursting and the feta is soft and golden brown.Cook the Pasta: While the feta and tomatoes are baking, cook your pasta according to the package directions. Reserve about 1 cup of the pasta water before draining.Combine: Once the feta and tomatoes are out of the oven, immediately mash them together with a fork. The feta will melt into a creamy sauce with the tomatoes and olive oil.Mix Everything: Add the cooked pasta and most of the fresh basil to the baking dish. Toss everything together, adding a splash of the reserved pasta water to achieve your desired sauce consistency. Garnish with the remaining fresh basil and serve immediately.

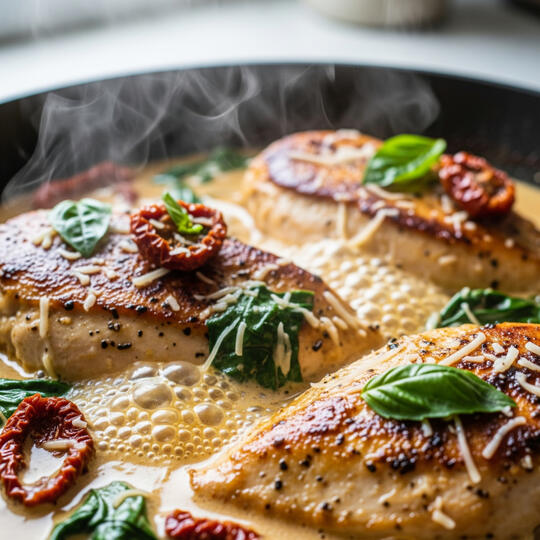
Marry Me Chicken
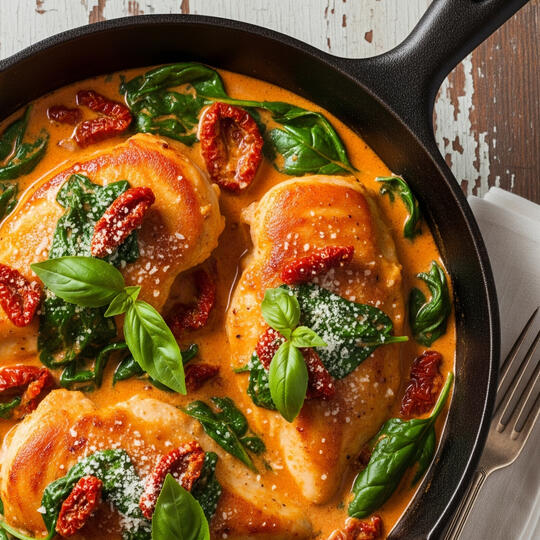
This dish gets its name from its rich, creamy, and delicious flavor, which is said to be so good it might just prompt a marriage proposal. It’s relatively quick to make and uses simple ingredients, making it a perfect weeknight meal.
Marry Me Chicken
The recipe provided is designed to serve 4 people.
Ingredients:
* 1.5 lbs boneless, skinless chicken breasts (or thighs), sliced horizontally to half-inch thickness
* 1 tbsp olive oil
* 2 tbsp butter
* 1 large shallot, finely chopped (or 1/2 small onion)
* 3-4 cloves garlic, minced
* 1/2 cup chicken broth
* 1/2 cup heavy cream
* 1/2 cup sun-dried tomatoes, drained and roughly chopped
* 1/2 tsp red pepper flakes (adjust to your spice preference)
* 1/2 tsp dried oregano
* 1/4 cup grated Parmesan cheese
* 1/4 cup fresh basil, chopped
* Salt and black pepper to taste
Instructions:
1. Prep the Chicken: Pat the chicken dry with a paper towel and season both sides generously with salt and pepper.
2. Cook the Chicken: Heat the olive oil and butter in a large skillet or pan over medium-high heat. Add the chicken and cook for 3-5 minutes per side, or until golden brown and cooked through. Remove the chicken from the pan and set it aside on a plate.
3. Make the Sauce: Reduce the heat to medium. Add the chopped shallot and cook until softened, about 2 minutes. Add the minced garlic, sun-dried tomatoes, red pepper flakes, and oregano. Cook for another minute until fragrant.
4. Simmer the Sauce: Pour in the chicken broth and scrape up any browned bits from the bottom of the pan. Bring to a simmer and let it reduce slightly, for about 2-3 minutes.
5. Add the Cream and Cheese: Reduce the heat to low and stir in the heavy cream and grated Parmesan cheese. Simmer gently until the sauce thickens slightly, about 3-4 minutes.
6. Combine and Serve: Return the cooked chicken to the pan and nestle the pieces into the sauce. Sprinkle with fresh chopped basil. Serve immediately over pasta, rice, or with a crusty bread to soak up the delicious sauce.
Chewy Chocolate Cookies
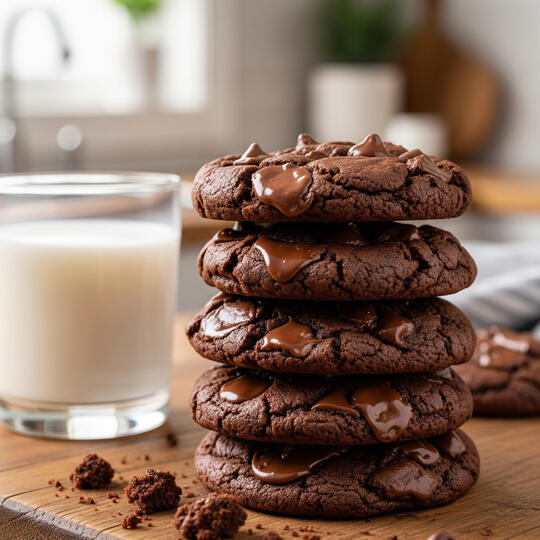
This recipe balances a rich chocolate flavor with a perfectly chewy texture. The secret is using a mix of brown and white sugar and not overbaking!
Chewy Chocolate Cookies
Yields:
Approximately
2 dozen cookies
Prep time:
15 minutes
Bake time:
10-12 minutes
Chill time:
30 minutes (recommended)
Ingredients:
1 cup (2 sticks or 226g) unsalted butter, softened3/4 cup (150g) granulated sugar3/4 cup (165g) packed light brown sugar2 large eggs, at room temperature1 teaspoon vanilla extract2 1/4 cups (270g) all-purpose flour1/2 cup (45g) unsweetened cocoa powder (Dutch-process is best for a darker color)1 teaspoon baking soda1/2 teaspoon salt2 cups (340g) chocolate chips or chunks (a mix of semi-sweet and milk chocolate works well)
Instructions:
Preheat Oven & Prep Pans:
Preheat your oven to 375°F (190°C). Line two large baking sheets with parchment paper.Cream Butter & Sugars:
In a large bowl, using a hand mixer or a stand mixer with the paddle attachment, beat the softened butter, granulated sugar, and light brown sugar on medium speed until the mixture is light and fluffy, about 2-3 minutes. Scrape down the sides of the bowl as needed.Add Eggs & Vanilla:
Add the eggs one at a time, mixing well after each addition. Stir in the vanilla extract.Combine Dry Ingredients:
In a separate medium bowl, whisk together the flour, cocoa powder, baking soda, and salt.Combine Wet & Dry:
Gradually add the dry ingredient mixture to the wet ingredients, mixing on low speed until just combined. Be careful not to overmix.Fold in Chocolate Chips:
*Gently fold in the chocolate chips or chunks using a spatula.Chill Dough (Recommended):
For best results, cover the dough and refrigerate for at least 30 minutes. This helps the flavors meld and prevents the cookies from spreading too much while baking. You can chill the dough for up to 24 hours.Scoop & Bake:
Scoop rounded tablespoons of dough and place them about 2 inches apart on the prepared baking sheets.Bake:
Bake for 10-12 minutes, or until the edges are set and the centers are still slightly soft. They may look underdone, but they will continue to set as they cool.Cool:
Let the cookies cool on the baking sheets for 5 minutes before transferring them to a wire rack to cool completely.
Tips for the Best Results:
Don't Overbake:
The key to a chewy cookie is pulling them from the oven when they still look a little soft in the center.Room Temperature Ingredients:
Make sure your butter and eggs are at room temperature. This helps them incorporate properly and creates a better texture.Dutch-Process Cocoa:
Using Dutch-process cocoa powder (which has a lower acidity) will give you a darker, richer color and a smoother chocolate flavor.Vary the Chocolate:
Feel free to use different types of chocolate chips—white chocolate, dark chocolate, or even peanut butter chips for a fun twist!

The Ultimate Classic Trifle
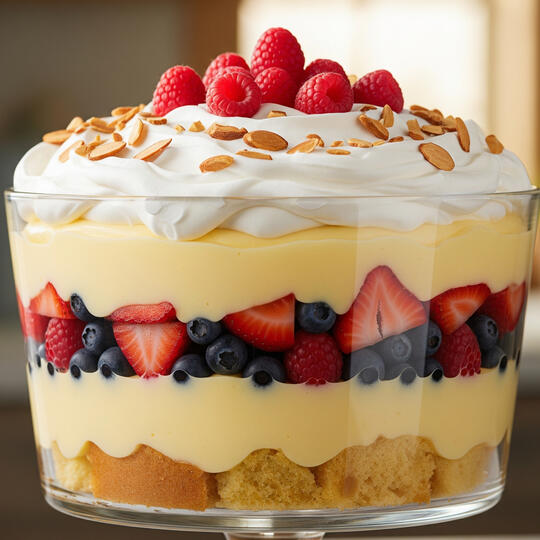
This recipe combines layers of light sponge, fresh berries, creamy custard, and a hint of sherry for a truly indulgent and satisfying dessert.
The Ultimate Classic Trifle
Yields:
10-12 servings
Prep time:
30 minutes
Chill time:
4 hours or overnight
Ingredients:
For the Sponge Layer:1 large store-bought sponge flan base (or 1 large packet of ladyfingers/boudoir biscuits)1/2 cup sweet sherry, kirsch, or orange juice (for a non-alcoholic option)For the Jelly Layer:1 packet (85g/3 oz) raspberry or strawberry jelly crystals1 1/2 cups boiling water1 1/2 cups fresh raspberries or strawberries, slicedFor the Custard Layer:3 cups whole milk1 vanilla bean, split, or 1 tsp vanilla extract4 large egg yolks1/2 cup caster sugar1/4 cup cornflour (cornstarch)For the Whipped Cream Layer:2 cups heavy/double cream2 tbsp icing sugar (powdered sugar)1 tsp vanilla extractFor Garnish:1/2 cup toasted slivered almondsExtra fresh raspberries, strawberries, or other seasonal berriesEquipment:
A large glass trifle bowl (at least 3-4 liters)SaucepansMixing bowlsWhisk
Instructions:
Step 1:
Make the Custard
In a medium saucepan, gently heat the milk with the vanilla bean (if using). Bring it to a simmer, then turn off the heat and let it sit for 15 minutes to infuse. Remove the vanilla bean (you can scrape the seeds out and return them to the milk). If using vanilla extract, stir it in at the end.In a separate bowl, whisk together the egg yolks, caster sugar, and cornflour until smooth and pale.Slowly pour the warm milk into the egg mixture, whisking constantly to prevent the eggs from scrambling.Pour the entire mixture back into the saucepan. Cook over medium-low heat, stirring continuously with a wooden spoon or whisk, until the custard thickens to a consistency similar to pouring cream. Do not let it boil.Pour the custard into a bowl and cover the surface with cling film to prevent a skin from forming. Let it cool completely. You can place it in the fridge to speed up the process.Step 2:
Prepare the Jelly
Dissolve the jelly crystals in the boiling water in a bowl according to the packet instructions. Set aside to cool slightly.Once the jelly is no longer hot, place half of the fresh berries in the bottom of your trifle bowl.Step 3:
Assemble the First Layer (Sponge & Jelly)
Cut the sponge flan base into 2-inch cubes or break up the ladyfingers.Arrange the sponge pieces in a single layer at the bottom of the trifle bowl, on top of the berries. Press them down gently to create a solid base.Evenly pour the sherry (or orange juice) over the sponge to moisten it.Carefully pour the cooled, liquid jelly over the sponge and berries.Place the bowl in the refrigerator for at least 2-3 hours, or until the jelly has set firm.Step 4:
Layer with Custard
Once the jelly is completely set, check on your cooled custard. Give it a good whisk to smooth it out.Gently and evenly spoon the custard over the set jelly layer. Use a spatula to create a smooth, flat surface.Return the trifle to the fridge for at least 30 minutes to firm up the custard.Step 5:
Add the Cream and Final Garnishes
In a clean bowl, whip the heavy cream, icing sugar, and vanilla extract with an electric mixer until it forms soft to medium peaks. Be careful not to over-whip.Carefully spoon the whipped cream over the top of the custard layer, spreading it to the edges. You can create decorative swirls with the back of a spoon.Just before serving, scatter the remaining fresh berries and the toasted slivered almonds over the top.
Tips for Trifle Perfection:
Make Ahead:
The custard and jelly layers can be made a day in advance. Trifle actually benefits from sitting for several hours in the fridge, as it allows the flavors to meld together beautifully.Alternative Sponges:
You can use a pound cake, angel food cake, or even stale croissants for a unique texture.Fruit Variations:
Feel free to use other fruits like peaches, mangoes, or blueberries. Just make sure the fruit pairs well with the jelly flavor you choose.Alcohol:
The sherry adds a classic, sophisticated flavor. For a different twist, try a liqueur like Amaretto, Grand Marnier, or even a splash of rum.Custard:
If you're short on time, a high-quality store-bought ready-made custard can be a good substitute. Just make sure it's a good quality one.

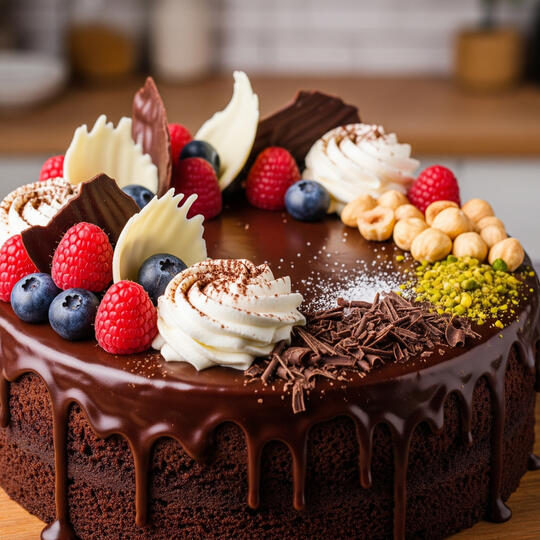
Classic Chocolate Mud Cake
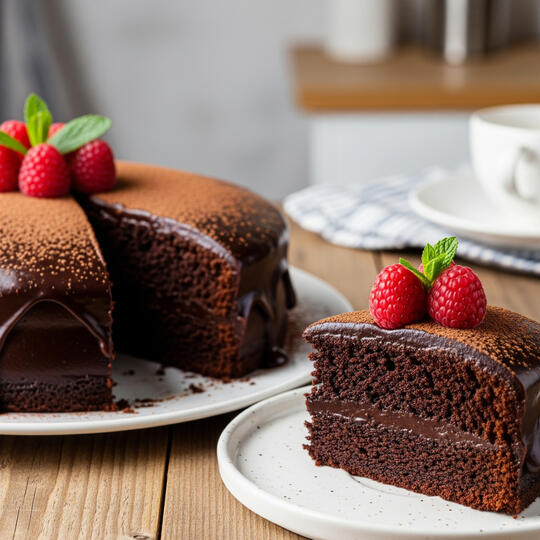
This recipe creates a rich, dense, and moist chocolate cake that is perfect for any special occasion. The mud cake is known for its fudgy texture, making it a favorite among chocolate lovers.
Classic Chocolate Mud Cake
Yields:
One 9-inch round cake
Prep time:
20 minutes
Cook time:
1 hour to 1 hour 15 minutes
Cool time:
At least 2 hours
Ingredients:
200g unsalted butter200g good-quality dark chocolate (70% cocoa), broken into pieces1 cup (250ml) water1 cup (200g) granulated sugar¾ cup (180ml) buttermilk2 large eggs, lightly beaten1 ¾ cups (210g) all-purpose flour¼ cup (25g) unsweetened cocoa powder1 ½ tsp baking sodaPinch of salt
Instructions:
Prepare for baking:
Preheat your oven to 160°C (320°F). Grease and line a 9-inch round cake pan with baking paper, ensuring the paper comes up the sides.Melt the chocolate mixture:
In a medium saucepan, combine the butter, dark chocolate, water, and granulated sugar. Place the saucepan over low heat and stir continuously until the butter and chocolate have melted and the mixture is smooth. Remove from the heat and allow the mixture to cool for 10 minutes.Combine wet ingredients:
Once the chocolate mixture has cooled slightly, whisk in the buttermilk and the lightly beaten eggs.Sift dry ingredients: In a separate large bowl, sift together the all-purpose flour, cocoa powder, baking soda, and salt.Combine wet and dry:
Gradually pour the wet chocolate mixture into the bowl of dry ingredients. Whisk gently until just combined. Be careful not to overmix, as this can make the cake tough.Bake the cake:
Pour the batter into your prepared cake pan. Place it in the preheated oven and bake for 1 hour to 1 hour and 15 minutes. To check for doneness, a skewer inserted into the center should come out with moist crumbs attached, but not wet batter.Cool completely:
Let the cake cool in the pan for at least 30 minutes before carefully transferring it to a wire rack to cool completely. The cake will be very soft and fragile when warm, so patience is key!Frost and decorate:
Once the cake is completely cool, you can frost it with your favorite chocolate ganache or buttercream. For a classic mud cake finish, a simple dark chocolate ganache is highly recommended.
Tips:
Buttermilk is key:
Buttermilk adds moisture and a slight tang that balances the richness of the chocolate. If you don't have buttermilk, you can make a substitute by adding 1 tablespoon of white vinegar or lemon juice to a measuring cup and filling the rest with milk. Let it sit for 5 minutes before adding to the recipe.Don't overmix:
Overmixing the batter will develop the gluten in the flour, resulting in a dense and rubbery cake. Mix only until the ingredients are just combined.Low and slow:
Baking at a lower temperature for a longer time allows the cake to cook evenly and develop its signature fudgy texture without drying out.Patience is a virtue:
The cake must be completely cool before you try to frost it, otherwise the frosting will melt and the cake may crumble.
Pork and Chive Dumplings

This recipe makes a classic, flavorful dumpling with a juicy pork and chive filling. You can steam, pan-fry, or boil them—the choice is yours!
Homemade Pork and Chive Dumplings
Yields:
approximately 40-50 dumplings
Prep time:
45 minutes
Cook time:
10-15 minutes
Ingredients:
For the Filling:1 lb (450g) ground pork, not too lean (about 20-30% fat is ideal for a juicy filling)1 bunch (about 6-7 oz / 170-200g) fresh chives, finely chopped1-inch piece of ginger, peeled and grated2 cloves garlic, minced2 tbsp soy sauce (light or regular)1 tbsp Shaoxing wine (or dry sherry)1 tbsp sesame oil1 tsp sugar1/2 tsp white pepper1/4 cup chicken broth or waterFor the Wrappers:1 package (14-16 oz / 400-450g) round dumpling wrappers (Gyoza or Wonton wrappers also work)A small bowl of water for sealing
Instructions:
1. Prepare the Filling:In a large bowl, combine the ground pork, finely chopped chives, grated ginger, and minced garlic.Add the soy sauce, Shaoxing wine, sesame oil, sugar, and white pepper.Mix everything together with your hands or a spoon until well combined.Slowly pour in the chicken broth or water, mixing it into the meat until it is fully absorbed. The mixture should be a bit loose and sticky, which will result in a very juicy dumpling.Cover the bowl and let the filling rest in the refrigerator for at least 15 minutes to allow the flavors to meld.2. Assemble the Dumplings:Set up a dumpling-making station. Have your filling bowl, a stack of wrappers, a small bowl of water, and a baking sheet lined with parchment paper ready.Take one wrapper and place it in the palm of your non-dominant hand.Using a spoon or your fingers, place about 1-1.5 teaspoons of the filling in the center of the wrapper. Don't overfill it.Dip a finger in the bowl of water and moisten half of the wrapper's edge.Fold the wrapper in half to form a semi-circle. Pinch the top center together to seal.Create pleats on one side of the wrapper, folding the front edge over the back edge and pressing it firmly to seal. Make 3-4 pleats.Alternatively, you can simply press the edges together with your fingers to form a simple semi-circle, or use a fork to press and seal the edges.Place the finished dumpling on the parchment-lined baking sheet. Make sure they do not touch to prevent them from sticking.Repeat until you've used all the filling or wrappers.3. Cook the Dumplings:To Pan-Fry (Potstickers):
Heat 1-2 tbsp of cooking oil in a large non-stick skillet over medium-high heat.Place the dumplings in a single layer, flat side down, in the hot skillet. Do not overcrowd.Cook for 2-3 minutes, or until the bottoms are golden brown and crispy.Carefully pour about 1/4 cup of water into the skillet (it will sizzle and steam immediately).Quickly cover the skillet with a lid and reduce the heat to medium-low.Steam for 6-8 minutes, or until the water has evaporated and the filling is cooked through.Remove the lid and cook for another minute to re-crisp the bottoms if desired.orTo Boil:Bring a large pot of water to a rolling boil.Carefully drop the dumplings into the boiling water, stirring gently to prevent them from sticking to the bottom.Cook in batches to avoid overcrowding the pot.Once the dumplings float to the surface, cook for an additional 2-3 minutes.Use a slotted spoon to remove the cooked dumplings.orTo Steam:Fill a steamer pot or wok with 1-2 inches of water and bring to a boil.Line your bamboo steamer basket with parchment paper (punched with holes) or cabbage leaves to prevent sticking.Arrange the dumplings in the basket, leaving some space between them.Place the steamer basket over the boiling water, cover, and steam for 8-10 minutes, or until the wrappers are translucent and the filling is cooked.4. Serve:Serve the hot dumplings with your favorite dipping sauce. A classic sauce is a simple mixture of soy sauce, rice vinegar, a few drops of sesame oil, and a pinch of chili flakes or chili oil.Storage:You can freeze uncooked dumplings. Arrange them in a single layer on a parchment-lined baking sheet and freeze for 1-2 hours until solid. Then, transfer them to a freezer-safe bag or airtight container. They can be cooked from frozen, adding a few extra minutes to the cooking time.

Creamy Macaroni and Cheese
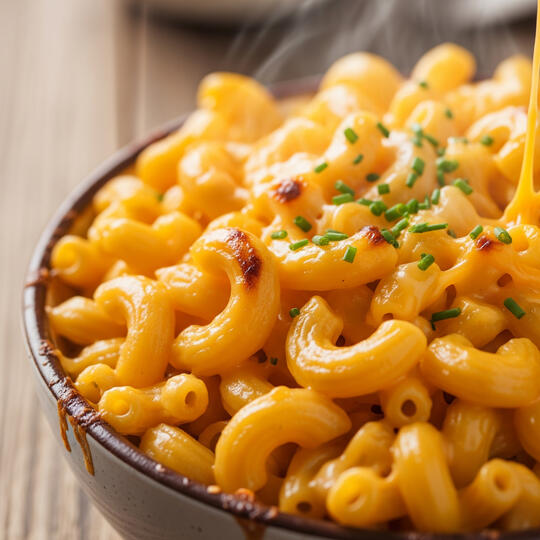
This recipe is a classic for a reason—it's easy, comforting, and incredibly delicious. This version uses a simple béchamel sauce to create a smooth and velvety cheese sauce that coats every single noodle.
Creamy Macaroni and Cheese
Yields: 4-6 servings
Prep time: 10 minutes
Cook time: 20-25 minutes
Ingredients:
* 1 pound elbow macaroni (or other short pasta like shells or cavatappi)
* 4 tablespoons unsalted butter
* 4 tablespoons all-purpose flour
* 3 cups whole milk, warmed slightly
* 2 cups shredded sharp cheddar cheese
* 1 cup shredded Monterey Jack cheese (or Gruyère, or another good melting cheese)
* 1/2 teaspoon salt, plus more for the pasta water
* 1/4 teaspoon black pepper
* 1/4 teaspoon ground mustard (optional, but highly recommended for a more complex cheese flavor)
* Pinch of cayenne pepper (optional, for a little kick)
Instructions:
1. Cook the Pasta: Bring a large pot of generously salted water to a boil. Add the macaroni and cook according to package directions until al dente. Drain the pasta well and set it aside.
2. Make the Béchamel: While the pasta is cooking, melt the butter in a large pot or Dutch oven over medium heat. Once the butter is melted, whisk in the flour and cook for 1-2 minutes, stirring constantly, until the mixture (called a roux) is smooth and bubbly.
3. Add the Milk: Slowly pour in the warm milk, whisking continuously to prevent lumps. Continue to whisk until the sauce is smooth and thickens, about 5-7 minutes.
4. Create the Cheese Sauce: Reduce the heat to low. Add the shredded cheddar, Monterey Jack, salt, pepper, ground mustard, and a pinch of cayenne (if using). Stir until the cheeses are completely melted and the sauce is smooth.
5. Combine and Serve: Add the drained macaroni to the cheese sauce and stir until everything is evenly coated. Serve immediately.
Tips for the Perfect Mac and Cheese:
* Grate Your Own Cheese: Pre-shredded cheese contains anti-caking agents that can make your sauce grainy. Grating your own cheese from a block will result in a much smoother, creamier sauce.
* Use a Variety of Cheeses: While cheddar is a must, using a blend of cheeses adds depth of flavor and improves the texture. The Monterey Jack adds creaminess, while a cheese like Gruyère can add a nutty, savory note.
* Don't Overcook the Pasta: Cook the pasta until it's just shy of done (al dente). It will continue to cook a bit in the hot cheese sauce, and this prevents it from becoming mushy.
* Add-Ins: Feel free to get creative! Stir in some cooked bacon, a handful of steamed broccoli florets, or some caramelized onions for an extra layer of flavor.
* For a Baked Mac and Cheese: Pour the finished macaroni and cheese into a baking dish. Top with a mixture of breadcrumbs, melted butter, and a little more cheese. Bake at 375°F (190°C) for 15-20 minutes, or until the topping is golden brown and bubbly.

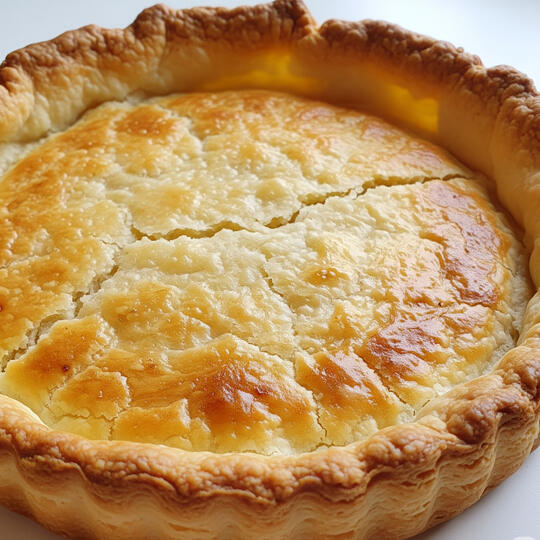
Tart Base Pâte Brisée

Tart bases, or tart crusts, are a fundamental part of many desserts and savory dishes. There are two main types of pastry dough used for tarts: Pâte Brisée and Pâte Sucrée.
* Pâte Brisée (pronounced "pat bree-ZAY") is a flaky, buttery, and less sweet dough, similar to a traditional pie crust. It's excellent for both sweet and savory tarts, like a fruit tart or a quiche.
Pâte Sucrée (pronounced "pat soo-KRAY") is a sweet, shortbread-like dough. It's more delicate and crumbly and is perfect for dessert tarts that have a filling that won't be baked, such as a fruit tart with pastry cream or a lemon curd tart.
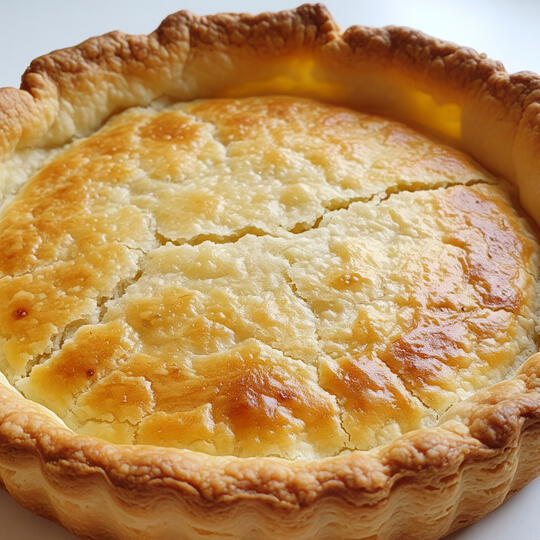
Pâte Brisée Recipe (Flaky Tart Base)
This recipe makes enough dough for one 9-inch tart pan with a removable bottom.
Ingredients:
* 1 1/2 cups (190 g) all-purpose flour
* 1/2 teaspoon fine sea salt
* 1/2 tablespoon granulated sugar (optional, for sweet tarts)
* 10 tablespoons (142 g) unsalted butter, very cold and cubed
* 1/4 to 1/3 cup (60-80 ml) ice-cold water
Instructions:
1. Combine Dry Ingredients:
In a large bowl, whisk together the flour, salt, and sugar (if using).2. Cut in the Cold Butter:
Add the cold, cubed butter to the flour mixture. Using a pastry cutter, your fingertips, or a food processor, work the butter into the flour until the mixture resembles coarse crumbs, with some pieces of butter still visible and ranging in size from peas to lentils. This is the key to creating a flaky crust. Avoid overworking the dough, as this will result in a tough crust.3. Add the Ice Water:
Gradually add the ice-cold water, one tablespoon at a time, mixing with a fork or your hands. Mix just until the dough begins to come together. The dough should still look shaggy and not completely smooth. Be careful not to add too much water; you want the dough to hold its shape without being sticky.4. Form and Chill the Dough:
Turn the dough out onto a clean work surface. Gently press the dough together into a flat disk, about 1-inch thick. Do not knead it. Wrap the disk tightly in plastic wrap and refrigerate for at least 30 minutes, or up to 2 days. This chilling period is crucial as it allows the gluten to relax and solidifies the butter, which will prevent the crust from shrinking during baking.5. Roll and Line the Tart Pan:
Lightly flour your work surface and rolling pin. Remove the chilled dough from the refrigerator and let it sit for a few minutes to soften slightly. Roll the dough out into an 11-12 inch circle, about 1/8-inch thick. Carefully transfer the dough to a 9-inch tart pan with a removable bottom. Gently press the dough into the bottom and up the sides of the pan, making sure it fits snugly into the fluted edges. Trim any excess dough from the top.6. Blind Bake the Crust (Optional, but Recommended):
Blind baking is recommended for quiches and pies with wet fillings to prevent a soggy bottom.* Preheat your oven to 375°F (190°C).
* Prick the bottom of the dough all over with a fork (docking).
* Line the inside of the dough with parchment paper and fill with pie weights, dried beans, or uncooked rice.
* Bake for 15-20 minutes, or until the edges are set and a light golden color.
* Carefully remove the weights and parchment paper. Return the tart shell to the oven and bake for another 5-10 minutes, or until the bottom is golden brown and the crust is fully cooked.
* Let the tart shell cool completely on a wire rack before adding your filling.
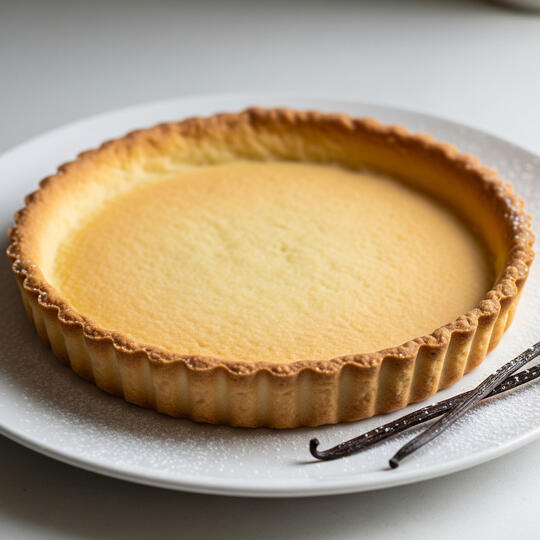
Tart Base Pâte Sucrée
Tart bases, or tart crusts, are a fundamental part of many desserts and savory dishes. There are two main types of pastry dough used for tarts: Pâte Brisée and Pâte Sucrée.
* Pâte Sucrée (pronounced "pat soo-KRAY") is a sweet, shortbread-like dough. It's more delicate and crumbly and is perfect for dessert tarts that have a filling that won't be baked, such as a fruit tart with pastry cream or a lemon curd tart.
Pâte Brisée (pronounced "pat bree-ZAY") is a flaky, buttery, and less sweet dough, similar to a traditional pie crust. It's excellent for both sweet and savory tarts, like a fruit tart or a quiche.
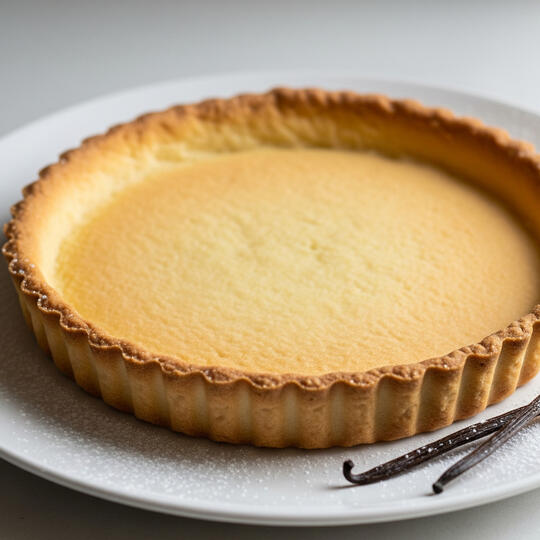
Sweet Tart Base Recipe (Pâte Sucrée)
This recipe is for a classic, all-purpose sweet tart base, which is a type of Pâte Sucrée. It's reliable, easy to work with, and results in a delicious, tender crust.
This recipe makes enough dough for one 9-inch tart pan with a removable bottom.
Ingredients:
* 1 1/2 cups (190 g) all-purpose flour
* 1/4 cup (50 g) granulated sugar or powdered sugar*
* 1/4 teaspoon fine sea salt
* 8 tablespoons (113 g) unsalted butter, cold and cubed
* 1 large egg yolk, cold
* 1 tablespoon cold water or milk (optional, as needed)Note on Sugar: Using powdered sugar (confectioners' sugar) will give you a more delicate, shortbread-like texture. Granulated sugar will result in a slightly crunchier crust.
Instructions:
1. Combine Dry Ingredients:
In a large bowl, whisk together the flour, sugar, and salt.2. Cut in the Butter:
Add the cold, cubed butter to the dry ingredients. Using your fingertips, a pastry cutter, or a food processor, work the butter into the flour mixture until it resembles coarse crumbs or fine breadcrumbs, with some larger, pea-sized pieces of butter remaining. This is a crucial step for a tender, flaky crust. If using your hands, work quickly to prevent the butter from getting too warm.3. Add the Egg Yolk:
Add the egg yolk and mix with a fork or your hands just until the dough starts to come together. If the dough seems too dry and is not coming together, add the tablespoon of cold water or milk. Be careful not to overwork the dough; you want it to just barely hold together.4. Form and Chill the Dough:
Turn the dough out onto a clean work surface. Gently press it into a flat disk, about 1-inch thick. Wrap the disk tightly in plastic wrap and refrigerate for at least 30 minutes, or up to 2 days. This chilling process is essential for making the dough easier to roll out and preventing it from shrinking while baking.5. Roll and Line the Tart Pan:
Lightly flour your work surface and rolling pin. Remove the chilled dough from the refrigerator and let it sit for a few minutes to soften slightly. Roll the dough out into an 11-12 inch circle, about 1/8-inch thick. Carefully transfer the dough to a 9-inch tart pan with a removable bottom. Gently press the dough into the bottom and up the sides of the pan, making sure it fits snugly into the fluted edges. Trim any excess dough from the top with a paring knife or by rolling the rolling pin over the top of the pan.6. Blind Bake the Crust (Highly Recommended):
Blind baking is the process of pre-baking the tart crust before adding the filling. This prevents a soggy bottom and ensures the crust is fully cooked.* Preheat your oven to 375°F ($190^\circ C$).
* Prick the bottom of the dough all over with a fork. This is called "docking" and helps to prevent the crust from puffing up.
* Line the inside of the dough with parchment paper or a coffee filter.
* Fill the pan with pie weights, dried beans, or uncooked rice, making sure to fill it all the way to the top and into the corners. This provides support for the crust as it bakes.
* Place the tart pan on a baking sheet to catch any drips and make it easier to handle.
* Bake for 15-20 minutes, or until the edges are set and a light golden color.
* Carefully remove the weights and parchment paper. Return the tart shell to the oven and bake for another 5-10 minutes, or until the bottom is golden brown and the crust is fully cooked.
* Let the tart shell cool completely on a wire rack before adding your filling.

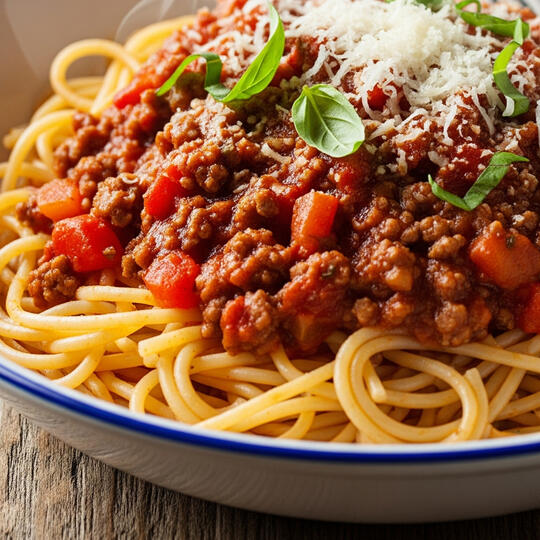
Classic spaghetti

This recipe focuses on building deep, complex flavors over time. It's a true "low and slow" method that results in a rich, velvety sauce.
Yields: 6-8 servings
Prep time: 30 minutes
Cook time: 2-3 hours (or more!)
History:
The history of spaghetti is a complex and fascinating journey that spans continents and centuries, and the popular image of "spaghetti with tomato sauce" is a relatively modern invention.The Origins of Pasta
The origins of pasta itself are widely debated, but it's clear that it was a part of the human diet long before it became a staple of Italian cuisine.The Marco Polo Myth: A common misconception is that Marco Polo brought noodles to Italy from China in the 13th century. While China has been making noodle-like foods for millennia, this story is largely considered a myth.Ancient Roots: Evidence suggests that pasta existed in Italy long before Marco Polo's travels. The Etruscans, a pre-Roman civilization, may have made a form of pasta. It's also likely that pasta evolved from Middle Eastern dishes, as dried pasta was introduced to Sicily by Arab traders in the 8th or 9th century. A 12th-century text even describes a place in Sicily where "a food made from flour in the form of strings" was exported.The Name "Spaghetti": The word "spaghetti" is a diminutive of the Italian word spago, meaning "thin cord." The term was first recorded in 1845, suggesting that the shape we know today as spaghetti became popular in Italy in the 19th century.The Rise of Spaghetti and Tomato Sauce
For centuries, pasta was a simple food, often eaten by hand with just olive oil, cheese, and pepper. The addition of tomato sauce is a much more recent development.The Tomato's Journey: Tomatoes were brought to Europe from the Americas by Spanish explorers in the 16th century. For a long time, Europeans, including Italians, believed they were poisonous and grew them primarily as ornamental plants.A Culinary Revolution: It wasn't until the 18th century that tomatoes began to be widely accepted as food in Italy. The first published Italian recipe for a tomato sauce appeared in a 1790 cookbook by Roman chef Francesco Leonardi. It was the Neapolitans, however, who pioneered the combination of pasta and tomato sauce in the 19th century. This simple, affordable, and flavorful pairing became incredibly popular.Spaghetti and Bolognese: A Tale of Two Dishes
The traditional Bolognese sauce (ragù alla bolognese) is not what most of the world knows as "Spaghetti Bolognese."Authentic Ragù: Originating in the city of Bologna in northern Italy, a true ragù is a rich, slow-cooked meat sauce made with a small amount of tomato, and often includes milk, wine, and a soffritto of onion, celery, and carrots. It is traditionally served with fresh, flat pastas like tagliatelle or fettuccine, which are better at holding the thick, chunky sauce. Serving it with thin spaghetti is generally not considered authentic in Italy.The American-Italian Creation: The iconic dish known globally as "Spaghetti Bolognese" is a fusion of these traditions. The dish became widely popular outside of Italy, particularly in the United States and the United Kingdom, after World War II. It was a product of Italian immigrants in America who adapted their traditional sauces with new, readily available ingredients. They combined the hearty meat sauce with the more widely available dried spaghetti, and often made a much more tomato-heavy sauce than a classic ragù. The popular "Spaghetti and Meatballs" is a purely Italian-American dish, born from this same tradition of using more affordable meat in a richer sauce.In short, while pasta has ancient roots, the "classic" spaghetti and tomato sauce dish we know today is a relatively modern invention, and its most famous variants, like "Spaghetti Bolognese," are beloved international adaptations rather than strict Italian originals.
Ingredients
For the Bolognese Sauce:
* 1 tbsp olive oil
* 20g unsalted butter
* 1 large onion, finely chopped
* 2 carrots, finely diced
* 2 celery stalks, finely diced
* 2-3 cloves garlic, minced
* 500g minced beef (80/20 fat ratio is ideal for flavor)
* 150g pancetta, finely diced (or streaky bacon)
* 150ml dry red wine (a Merlot or Sangiovese works well)
* 400g can crushed tomatoes
* 1 tbsp tomato paste
* 1 beef bouillon cube or 1 tsp beef stock powder
* 2 bay leaves
* A pinch of nutmeg, freshly grated
* 200ml milk
* Salt and black pepper to tasteFor Serving:
* 500g spaghetti
* Freshly grated Parmesan cheese
* Fresh basil or parsley, for garnish
Instructions
1. Prepare the 'Soffritto' Base:
* In a large, heavy-bottomed pot or Dutch oven, heat the olive oil and butter over medium heat.
* Add the finely chopped onion, carrots, and celery. This vegetable mixture is known as a soffritto.
* Cook gently for 10-15 minutes, stirring occasionally, until the vegetables have softened and the onion is translucent. Do not let them brown.2. Brown the Meat:
* Increase the heat to medium-high. Add the diced pancetta and cook for 2-3 minutes until it starts to crisp.
* Add the minced beef and cook, breaking it up with a wooden spoon, until it is evenly browned. This step is crucial for developing flavor.
* Add the minced garlic and cook for another minute until fragrant.3. Deglaze and Build Flavor:
* Pour in the red wine, scraping the bottom of the pot to lift any browned bits (this is called deglazing).
* Let the wine simmer and reduce until it has almost completely evaporated. This concentrates the wine's flavor.4. Simmer the Sauce (The "Low and Slow" Part):
* Stir in the tomato paste, crushed tomatoes, beef bouillon cube, bay leaves, and a generous pinch of grated nutmeg.
* Bring the sauce to a gentle simmer.
* Pour in the milk. This might seem unusual, but it tenderizes the meat and adds a rich, creamy texture to the finished sauce.
* Reduce the heat to the lowest setting. Cover the pot, leaving the lid slightly ajar to allow steam to escape.
* Simmer for at least 2 hours, but preferably 3-4 hours or even longer. The longer you cook it, the deeper and richer the flavor will be. Stir occasionally to prevent sticking. The sauce should be thick and velvety, with the fat separated and glistening on top.5. Adjust Seasoning:
* After simmering, remove the bay leaves.
* Taste the sauce and adjust the seasoning with salt and pepper as needed.6. Cook the Pasta:
* When the sauce is ready, bring a large pot of salted water to a boil.
* Cook the spaghetti according to package directions until al dente (firm to the bite).7. Serve:
* Drain the spaghetti and return it to the pot.
* Ladle a generous amount of the Bolognese sauce over the pasta. Toss to combine, allowing the pasta to absorb some of the sauce.
* Serve immediately, topped with plenty of freshly grated Parmesan cheese and a sprinkle of fresh basil or parsley.
Side dishes:
Here are some excellent side dishes to accompany your classic Bolognese:1. Garlic Bread (or Other Crusty Bread)
This is a non-negotiable classic for a reason. The warm, buttery, and garlicky bread is perfect for sopping up every last bit of that delicious, rich sauce.* Classic Garlic Bread:
Slice a loaf of crusty Italian bread or baguette, slather with a mixture of softened butter, minced garlic, and parsley, then bake until golden and fragrant.* Cheesy Garlic Bread:
Take it a step further by sprinkling mozzarella or Parmesan cheese over the top before baking.
* Bruschetta:
For a fresher, more rustic option, serve bruschetta topped with a mixture of fresh tomatoes, garlic, and basil.2. Simple, Crisp Salad:
The richness of the Bolognese sauce is perfectly balanced by the clean, sharp flavors of a green salad.* Simple Italian Salad:
Toss crisp lettuce (like romaine or iceberg) with sliced red onion, cucumber, and cherry tomatoes. Dress it simply with a vinaigrette made from olive oil, red wine vinegar, salt, and pepper.* Arugula Salad:
A peppery arugula salad with a light lemon vinaigrette is a fantastic choice. You can add shaved Parmesan and a few toasted pine nuts for extra flavor.* Caprese Salad:
A simple Caprese salad of fresh mozzarella, ripe tomatoes, and basil leaves, drizzled with balsamic glaze and olive oil, provides a beautiful and refreshing counterpoint.3. Roasted or Sautéed Vegetables
Cooking vegetables brings out their natural sweetness and pairs wonderfully with the savory sauce.* Roasted Broccoli or Asparagus:
Toss broccoli florets or asparagus spears with olive oil, salt, and pepper, then roast in a hot oven until tender and slightly caramelized. A squeeze of fresh lemon juice before serving adds a nice brightness.* Sautéed Zucchini:
Slice zucchini and sauté it quickly in a pan with a little olive oil and garlic. It's a simple and healthy side that doesn't overpower the main dish.* Green Beans with Almonds:
Lightly steamed or blanched green beans tossed in butter or olive oil with toasted slivered almonds offer a delightful crunch and fresh flavor.
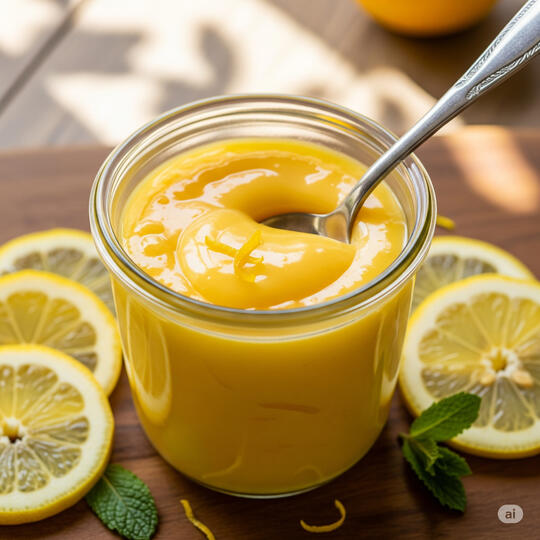
Lemon Curd

Here is a classic recipe for delicious and tangy lemon curd. This recipe uses a double boiler method, which provides gentle heat and helps prevent the eggs from scrambling, resulting in a perfectly smooth and silky curd.
Lemon Curd
History:
Lemon curd's story is rooted in 18th-century England. The earliest versions were a far cry from the smooth custard we know today; they were a simple way of preserving lemons. The recipe involved using lemon juice to curdle cream, and the solids, or "curds," were then strained out and preserved—a recipe often referred to as "lemon cheese."The recipe evolved significantly in the 19th century, as cooks began adding eggs, butter, and sugar. This transformed the mixture into the rich, velvety spread we now enjoy. By the Victorian era, lemon curd had become a beloved staple of afternoon tea, a delightful topping for scones and a luxurious filling for tarts. While some still use the old term "lemon cheese," "lemon curd" is the name that stuck and became a worldwide classic.
Ingredients
4 large egg yolks2 large eggs1 cup (200g) granulated sugar1/2 cup (120ml) fresh lemon juice (from 2-3 lemons)2 tablespoons lemon zest (from 2-3 lemons)1/2 cup (113g) unsalted butter, cubed and coldPinch of salt
Instructions
Prepare a Double Boiler:
Fill a medium saucepan with about 1-2 inches of water and bring it to a simmer over medium-low heat.Combine Ingredients:
In a heatproof bowl that fits snugly over the saucepan (without touching the water), whisk together the egg yolks, whole eggs, granulated sugar, lemon juice, lemon zest, and salt.Cook the Curd:
Place the bowl over the simmering water. Whisk the mixture constantly until the sugar is dissolved and the curd begins to thicken. This will take about 8-10 minutes. The curd is ready when it is thick enough to coat the back of a spoon and you can draw a clean line through it with your finger.Add the Butter:
Remove the bowl from the heat. Gradually whisk in the cold, cubed butter, one piece at a time. Continue to whisk until each piece of butter is fully melted and incorporated into the curd, making it smooth and glossy.Strain for Smoothness (Optional but Recommended):
For an extra-silky texture, press the finished curd through a fine-mesh sieve into a clean bowl. This will remove any cooked egg bits or lemon zest.Chill:
Cover the bowl with plastic wrap, pressing the plastic directly onto the surface of the curd to prevent a skin from forming.Store:
Refrigerate for at least 2 hours, or until completely chilled and set. The curd will continue to thicken as it cools.Tips for Success
Use Fresh Lemons:
Freshly squeezed lemon juice and zest are essential for the best, most vibrant flavor.Don't Rush the Process:
Cooking over gentle heat is key. High heat will scramble the eggs.Whisk Constantly:
Continuous whisking helps the eggs cook evenly and prevents lumps.Storage:
Lemon curd can be stored in an airtight container in the refrigerator for up to two weeks.
USES:
Lemon curd is incredibly versatile and can be used in a variety of sweet applications. It works well as a topping, a filling, or a key ingredient in baked goods
As a Topping or Spread:
* Scones, toast, croissants, or pancakes
* Yogurt, oatmeal, or granola
* Ice cream or pavlovaAs a Filling:
* Tarts and pies (e.g., lemon meringue pie)
* Layer cakes and cupcakes
* Crêpes, doughnuts, or eclairsAs an Ingredient:
* Swirled into cheesecake batter or brownies
* Mixed into a mousse or trifle
* In cocktails to add a tangy, creamy element
About
Recipe Book Development By - "3 Sister Recipe" & "$VBV", Enjoy!
Contact
If you have a recipe idea you would like featured please email to:
"Cooking with MUM & DAD" @: [email protected]